
Did you know? One often-overlooked reason Europe surged ahead of the rest of the world 400 years ago—including China, with its 5,000 years of history—was the invention of glass. This breakthrough led to the creation of microscopes and telescopes, opening Europeans’ eyes to the microscopic and the distant.
This same principle remains powerful in education today: introducing children to the wonders of the unseen micro world and the faraway expands their minds. That’s why today’s focus is how to choose the right telescope for your child. (For tips on microscopes, check out my other articles!)
The astronomical telescopes often symbolize a character’s curiosity, adventurous spirit, and desire to explore the universe. Whether it’s the classic image of stargazing or dreams of landing on the moon, telescopes have come to represent lofty aspirations and the pursuit of knowledge. But while these portrayals might spark interest in astronomy, choosing the right telescope for a child requires some careful consideration. It’s important to understand what makes a good entry-level telescope for young astronomers and what safety precautions should be taken.


Important Safety Considerations
Before diving into the technical aspects of choosing a telescope, it’s crucial to emphasize safety, especially when it comes to children. Astronomical telescopes are powerful tools designed to gather and focus light, which means they can pose a risk to young eyes if not used properly. Directly aiming a telescope at the sun or any other bright light source can cause irreversible damage to a child’s eyesight. This is particularly true for beginner telescopes, which might not have the advanced filters needed to protect users from harmful solar radiation.
Parents should always supervise their children when using telescopes and make sure they understand the risks. It’s also essential to teach children that a telescope should never be aimed directly at the sun or any intense light source, even if they are excited to explore. A solar filter is a must if they want to safely observe the sun’s surface, such as sunspots or solar eclipses.

Key Telescope Parameters to Consider
When it comes to choosing a telescope for kids, the key to picking the right one lies in understanding some basic parameters. The selection of children’s telescopes and adult telescopes is different. While many people are quick to equate telescope quality with magnification, there are other factors that are equally, if not more, important. Here are the four main parameters to consider:
1. Aperture (Caliber)
The aperture of a telescope refers to the diameter of its main lens or mirror. This is one of the most important factors in determining the telescope’s ability to gather light. A larger aperture means the telescope can collect more light, which translates to brighter, clearer images of distant celestial objects. A bigger aperture allows for better detail and clarity, especially when observing faint stars, planets, or nebulae.
However, a larger aperture also means a heavier and bulkier telescope, which might be harder for a child to handle. When choosing a telescope for a child, it’s important to balance aperture size with ease of use. For entry-level telescopes, an aperture of 70mm to 80mm (about 2.8 to 3.1 inches) is a good starting point. This size will allow children to observe planets, the moon, and even some deep-sky objects like star clusters and galaxies, while still being portable enough for them to manage.

2. Focal Length and Focal Ratio
The focal length of a telescope refers to the distance between the objective lens or mirror and the point where the telescope forms an image. A longer focal length generally means higher magnification, which can be great for viewing planets or the moon in detail.
Focal length is closely related to another important parameter: the focal ratio (also known as the f-number). This is the ratio of the focal length to the aperture size. A telescope with a lower f-ratio (for example, f/5 or f/6) will produce a wider field of view, which is helpful for observing large objects like star clusters or the Milky Way. Telescopes with higher f-ratios (like f/10) will give a narrower, higher-magnification view, ideal for planets and the moon.
For children just starting out, it’s best to choose a telescope with a moderate focal length and a balanced focal ratio—around f/8 to f/10. This provides a good mix of image detail and ease of use, allowing them to explore a variety of objects without getting overwhelmed.
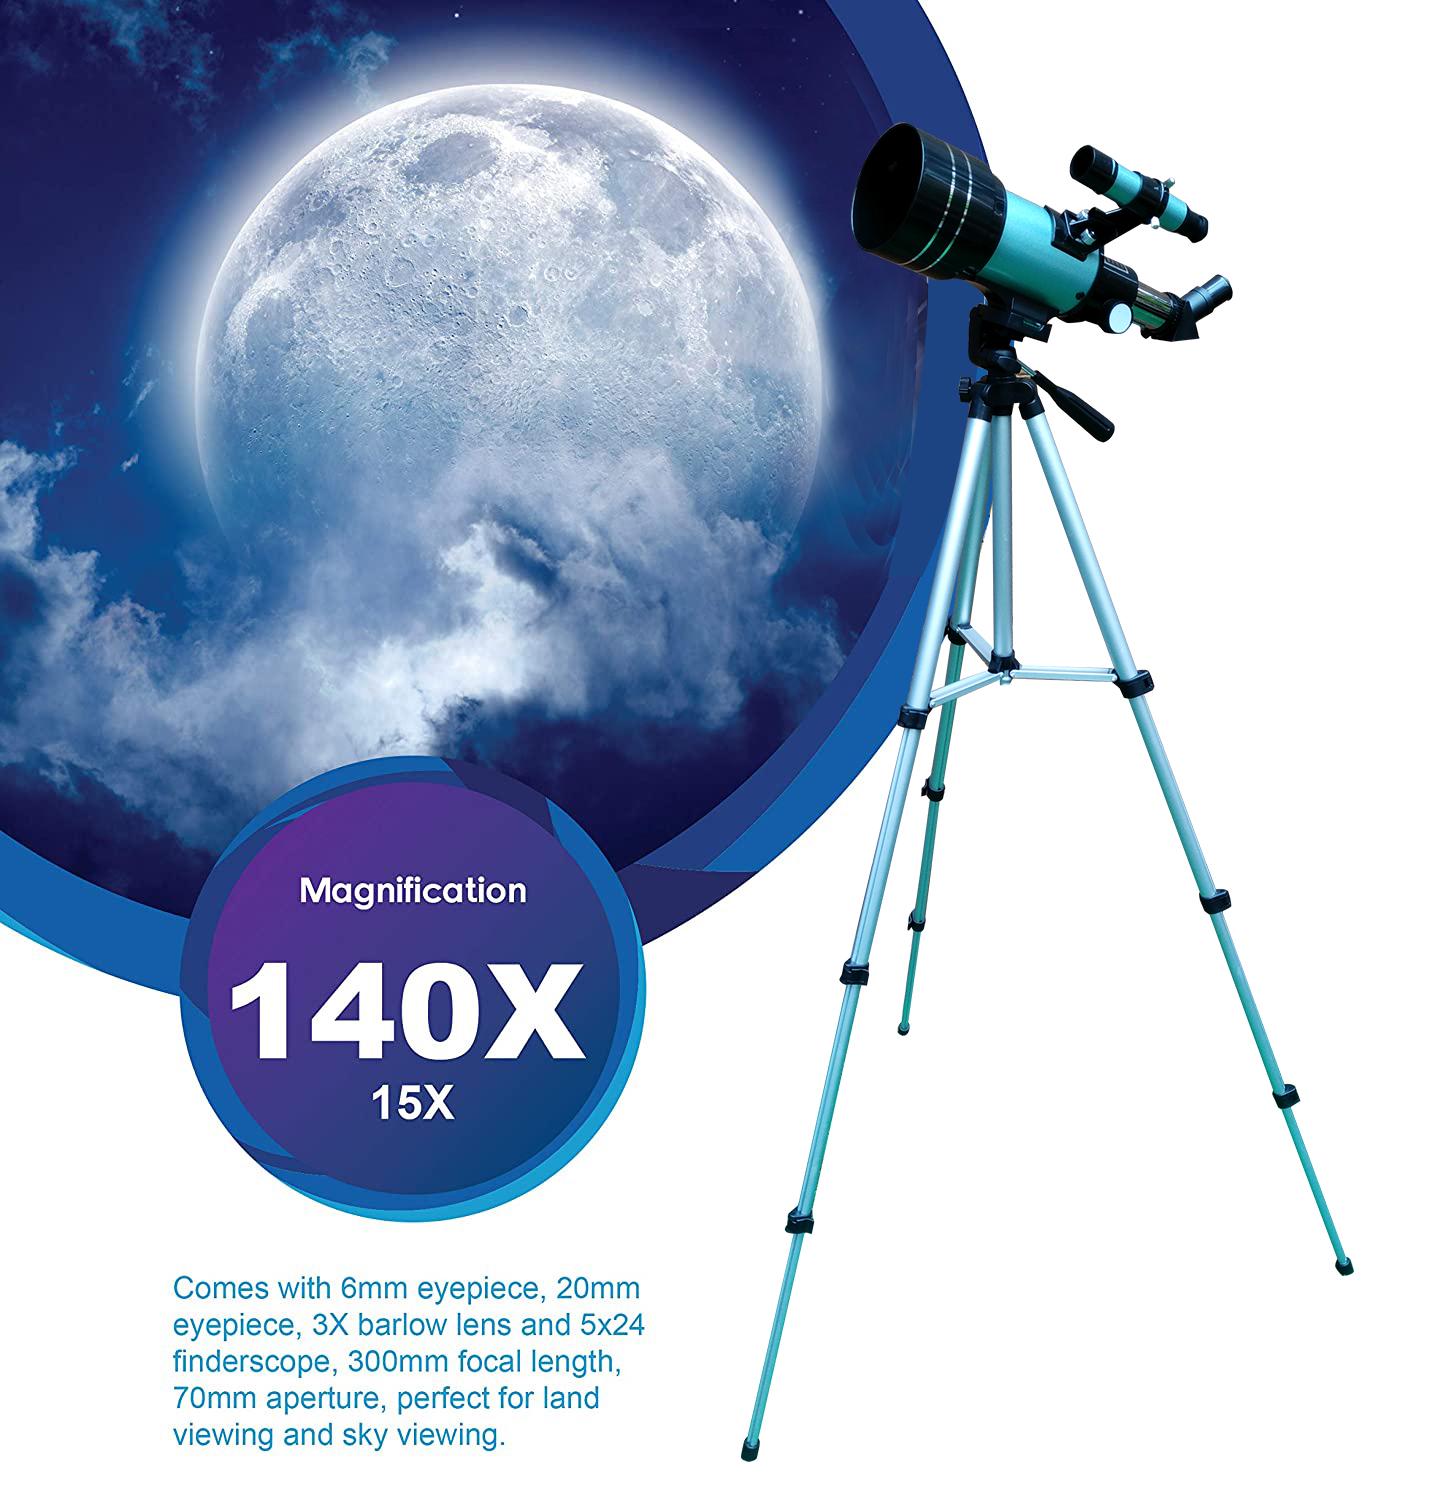
Pro Tip: If the technical specs seem overwhelming, just remember this golden rule—avoid excessive magnification. For most kids, staying below 90x ensures a clear, stable view without compromising quality.

3. Magnification – Why Avoid Excessive Magnification?
Magnification refers to how much larger an object will appear through the telescope compared to its appearance to the naked eye. Many people assume that a higher magnification means better observation, but that’s not always the case. Excessive magnification can result in blurry or unstable images, especially for beginners. Higher magnification also requires more stability, which can be difficult for children to manage.
It’s important to note that magnification is also related to the focal length of the telescope and the eyepiece being used. A typical entry-level telescope will come with a few eyepieces that allow for different magnifications. For young astronomers, it’s best to stick to a telescope that offers a reasonable magnification range—somewhere between 30x and 100x is perfect for most entry-level models. This will allow children to explore planets, craters on the moon, and some of the brighter deep-sky objects.
As mentioned earlier, spotting distant planets from Earth is inherently challenging—let alone observing them clearly. For young astronomers, the Moon and the Sun (with proper filters!) are the most practical and rewarding celestial targets.
That said, a telescope isn’t just for stargazing. In fact, you’ll likely use it more often for terrestrial observation—like landscapes or wildlife—where lower magnification (e.g., 30x) provides brighter, sharper, and more stable views.
Well, What multiple is appropriate? After extensive field testing and optical evaluation, I strongly recommend two exceptional entry-level telescopes for both astronomical and terrestrial observation:
70/360 Telescope
Type: Refractor
Magnification: 36x (with included eyepiece)
Key Features:
✓ K-eyepiece optics with minimal chromatic aberration.
✓ Ideal for detailed lunar observation (craters/maria clearly visible).
✓ Doubles as a powerful spotting scope for daytime use.

70/400 Telescope
Type: Refractor.
Magnification: 40x (with included eyepiece).
Key Advantages:
✓ Enhanced planetary viewing capability.
✓ Superior light gathering for twilight observations.
✓ Maintains excellent image quality for landscape viewing.
Want to see sample images taken with these telescopes? Welcome to share real observation examples.

4. Computer Control (GoTo)
While computer-controlled telescopes (GoTo systems) are an exciting option, they are generally more expensive and might not be necessary for young beginners. GoTo telescopes can automatically locate and track celestial objects for the user, which is a fantastic feature for advanced astronomers, but it can also be overwhelming for children just learning about the stars. Additionally, GoTo systems can add significant cost to a telescope.
For children just starting out, a simple manual telescope or one with a basic mount (like an altazimuth or equatorial mount) is often the best choice. These types of mounts are easy to use and encourage children to learn how to locate objects in the sky themselves, which can be a valuable educational experience.
Sometimes the most profound astronomy lessons happen when we put down the telescope and simply lie under the stars. Teaching children to: Recognize major constellations with their naked eyes. Understand celestial movements through direct observation. Develop spatial awareness by connecting stars into mythological shapes.
This foundational skill transforms them from passive viewers into active observers. After all, even Galileo began his journey by first learning the night sky’s basic geography.
Pro tip: Use a red-light star chart to preserve night vision during these sessions!
Additional Considerations
Ease of Setup and Use
When selecting a telescope for children, simplicity is key. Many beginner telescopes come with user-friendly instructions and easy-to-assemble components. Some models even include smartphone apps to assist with finding and identifying objects in the night sky. Look for telescopes that come with a sturdy, adjustable tripod or mount, and ensure the telescope is easy to aim and adjust for a child’s height and comfort.

Price Range
Entry-level telescopes for kids are available in a wide price range. As mentioned earlier, it’s important not to go for the cheapest option, as this often means sacrificing optical quality. On the other hand, very expensive telescopes may be too advanced or fragile for children to handle. The sweet spot for a child’s first telescope is typically between $100 and $300. This range provides a good balance of quality and affordability while still being manageable for kids.
Durability
Since children may be handling the telescope, durability is an important factor to consider. Look for telescopes made with sturdy materials and that can withstand a bit of rough treatment. It’s also helpful to choose models that come with protective cases or covers for lenses and eyepieces to prevent damage when not in use.
Conclusion
Selecting the right entry-level telescope for your child doesn’t have to be difficult. By understanding the basic parameters—aperture, focal length, magnification, and computer control—you can make an informed decision. Remember to prioritize safety, ease of use, and durability, and choose a telescope that matches your child’s age, interests, and ability level. A well-chosen telescope can spark a child’s imagination and provide years of fun, learning, and exploration of the wonders of the universe.